Friday, August 28, 2015

Dance In The Sun


Hello Friends

I wanted to make a quick tag for  Friends With Flair today. I got some new stamps and wanted to have a wee play with them.  So I made this kraft tag. It was super quick and easy to make. All I did was stamp with versamark ink on to a kraft tag and heat embossed it  with white embossing powder. I then added some lace and pearls to embellish it a little.  The flowers are from the Wish For The Best stamp set and the sentiment is from the In My Garden stamp set. It took me all of 5 mins to make and I love it.

Thanks for stopping by my blog today! Have a great weekend :)

Mandi xox

Also entering Simon Says Stamp Wed - Anything Goes

Friday, August 14, 2015

Craft Stamper TIMI August Challenge Reminder


Hello Friends :)

I am back with a wee reminder of our August TIMI challenge - Take A Technique. You have to use your pens and pencils on your project this month.  I made this card and used my fine liner pen to create a border around the edge.  There is so much you can do with this challenge, all you need is your imagination.  So grab your pens and pencils and create something beautiful.  There is a great prize to be won a lovely stamp plate from Chocolate Baroque.  All of the details are over at the Craft Stamper Blog.

I made my card using a sentiment from the Unity Fly With Wings of Hope stamp set.  I stamped with Versamark Ink and heat embossed with white embossing powder.  Then I sprayed my paper to make it slightly damp. Next I sprinkled on two colours of Brusho. I chose turquoise and cobalt blue. I love the way both of the colours blend into each other and left this crazy pattern behind.  I dried it with my heat tool and then used my fancy scissors to cut around the edge of the card. Next I punched some of these lovely white butterflies using my Martha Stewart 3 in 1 Butterfly Punch. I glued them on to the card leaving the wings pulled up slightly. Then I attached it to a white card base. Finally I used my fine liner pen and just squiggled a rough border around the edge.

 I hope you like my card and you come and join in the challenge. Thanks so much for stopping by my blog today!

Mandi xox


Friday, August 7, 2015

Craft Stamper TIMI Challenge August ~ Take A Technique : Pens & Pencils


Hello Friends

Can you believe it is August already? The months are flying by!  It is the first Friday of a new month you know what that means? We have a new Challenge over at the Craft Stamper Blog. This month our challenge is Take A Technique - Pens & Pencils. We want to see you using your pens and pencils on your project. I used water coloured pencils on my project.

I made this wee decorative pillow it is my first time making one. I don't own a sewing machine so I had to  sew it by hand. I forgot how tedious it is to sew by hand and stabbing your fingers with the needle is not fun ha!   I bought this fabric on clearance a few months ago I think it was like a $1. I am not sure what kind it is as there was no label on it but if feels like a very light canvas. I was not sure how the ink and pencils would react to it so I used some clear gesso over the top of it to give it a base to work on. I dried it with my heat gun before I stamped my image on to it.  I used archival ink and one of my favourite Unity Stamps called She Was A Daughter.


I used my watercolour pencils to colour it. I like the control they give you on the fabric. I used a mixture of Derwent Water Colour & Inktense pencils. I mixed the colours on the fabric then used a water brush to blend the colours. It came out so much better than I expected and managed to stay pretty much in the lines with the colour.  I think the gesso really helped as it made the fabric less porous. Next I stamped the sentiment out with my Curliecue Alphabet stamps from CTMH.  I dried it all with my heat gun to make sure it was completely dry. Then I sewed some buttons on to her dress. Finally I hand sewed the whole pillow with some turquoise thread and stuffed it with some pillow stuffing.


So now it is your turn to use your pens and pencils on your project. You can use anything you want from a fine liner pen to underline words to pencils for colouring.  Remember you must also have some stamping on your project since it is a stamping challenge after all.

Our sponsor this month is Chocolate Baroque who are giving away this lovely Artistic Affirmations Stamp plate to a lucky winner.


This is such a great prize don't you think?  So come and join in grab your pens and pencils and get crafty :) You can head  over to the Craft Stamper Blog  for all of the details.

Thanks so much for stopping by my blog today!

Mandi xox

linking up with Unity FWF

Wednesday, July 29, 2015

Let Your Hope Flutter


Hello Friends

I hope you are having a great week so far!! I got some new stamps and I have been playing around with them. This one is called Flutter it is a lovely butterfly stamp. You know how much I love my butterflies right? I will be getting a lot of use of out this one I know it will be one of my favourites.

 I decided to do something a wee bit different today. I always seem to be heat embossing and always seem to be using Turquoise. So I broke the mold ha :)  I went Pink! It is not my go to colour at all. I have a love hate relationship with the colour pink. The funny thing is when I do use this colour I usually end up loving what I made with it.

 I made the  background by smearing acrylic paint with my fingers. I found this technique on Trish Latimer's blog Ink, Paint, Beads.  I saw it a few weeks ago and forgot all about it until today. So I got out my paints and gave it a try. Go and have a wee look she has a great tutorial on paint smearing.

 I used dark pink and white acrylic paint on heavy weight water colour card. The reason being is I wanted to distress the edges of it and it leaves this nice worn edge on the card due to the texture. I used my fingers and smeared the paint all over the paper blending the colours until I was happy with the result. I was going for a messy look to it. The end result reminded me of raspberry ripple ice cream ha :)  Once the background was dry I stamped butterfly and sentiment with black archival ink. Then I distressed the edges and mounted it on to a black card base to finish.

 I really enjoyed trying this technique and I will be using it again. It was very therapeutic too :) 

Thanks so much for stopping by today!

Mandi xox

 Linking up with
 Simon Says Stamp Wednesday Anything Goes
Friends With Flair

Friday, July 24, 2015

Timing


Hello Friends

I hope you had a good week. I made this card a white ago and just got around to finishing it off.  I embossed this lovely flower stamp from Unity called Insightful Meadows with white embossing powder. Then I used my Brusho Crystal Colours Turquoise and Sea Green.  The Brusho does all of the work and creates this lovely background. I wanted to add some texture so I found some old seed beads just to give it a different look.  I love to experiment with different things.

The God's Timing sentiment  was stamped with the Hero Arts Ombre Ink this one is the Pool to Navy. I bought mine at Hobby Lobby and used a coupon.   I am not sure if I like it I need to play a little more with it.  But the idea is really nice where you have instant ombre without having to do it yourself.

I love the end result of this card. I hope you like it too.  I so need to send this card to myself ha :) timing is a funny old thing.  Waiting is hard for me. As I am sure it is for most of us. I have some things in my life I want to happen. It is hard to wait. But I know there is a perfect timing for everything. It is true God's timing is perfect and I just need to trust it. Easier said than done though don't you think??  Take a flower and all that it goes through to become one. The seed is still at work under the earth before it emerges into the light . We see the part that pops through the soil, but lots of things have to happen before it gets to that stage we just don't get to see it.  Everything will fall into place when it is the right time to do so and not a minute before.

Thanks so much for stopping by my blog today.

Mandi xox

Linking up with
Unity FWF
Simon Says Stamp Wednesday Sparkle & Shine
Paper Take Weekly Build It Up
Word Art Wednesday
Craft & Smash  Sentiments
 

Thursday, July 23, 2015

Refuge


Hello Friends

I was playing around in my craft room a few days ago.   I wanted to paint a butterfly but I ended up painting these wings instead. I had this bible verse stuck in my head too. So the two of them went perfect together. I painted the wings with gold acrylic paint and glitter. Then I typed out the words. I am not sure what I am going to do with it yet maybe I will put it in a frame.

I find there is a lot of poetic beauty in the Psalms. Even if you are not a person of faith I think you can still appreciate them for what they are. I love the idea that someone is looking out for me and wants to give me refuge from the world at times. I think we all need a little refuge, a place to take some time out and just be.


Thanks so much for stopping by my blog today.

Mandi xox

Linking up to Word Art Wednesday
Small Wonder 

Friday, July 17, 2015

Jars of Faith, Hope & Love


Hello Friends

I am back with some more upcycled jars.  I have been wanting to make this trio for a while. I decided to paint them white and then trim them with turquoise. I used chalk paint that I had left over from another project. I love the matte surface that chalk paint leaves behind.


  I  used a toothbrush and flicked some specs of turquoise paint on to the white since I wanted a speckled look. Then I stamped the words using archival ink and then outlined the words with a micron pen. The stamps I used are called Painted Sentiments from Unity.


Thanks so much for stopping by my blog today.

Mandi xox

Monday, July 13, 2015

Another Upcycle Project Using Chalk Paint


Hello Friends

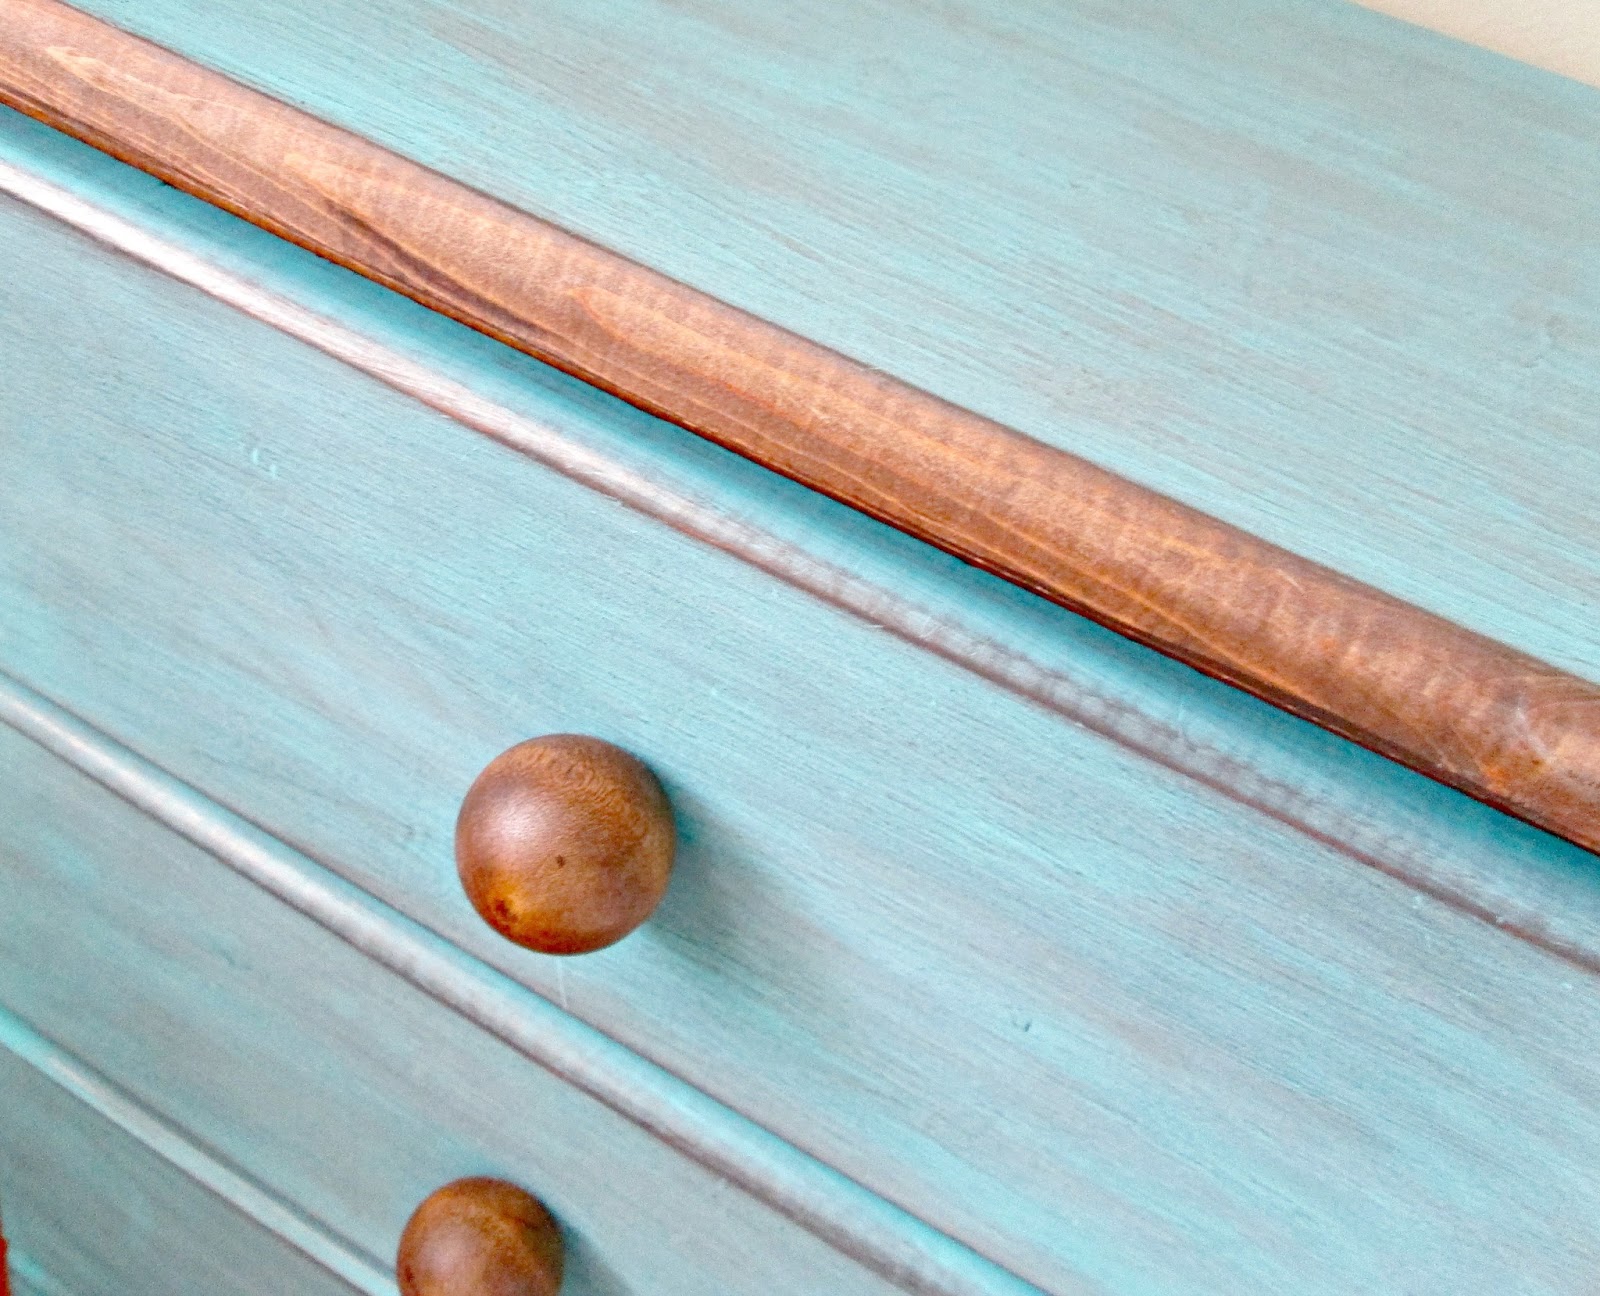
I had so much fun painting law week with my chalk paint I wanted to paint some more. So I got this wee set of drawers at the weekend at the freebie barn. It is a place here in Maine that people take there stuff they no longer want. It's essentially a thrift store only everything is free!! It's a great way to reuse and recycle and I love that.


 I decided to make this one two tone. the previous owner had already stained it a nice chocolate brown colour and I quite liked it. So I only painted the drawer fronts and the top. I used the same Waverly Chalk Paint that I had left from my last project you can read all about that here. I applied two coats of paint unevenly then once it was dry I used scrunched up aluminium foil to distress it.  I love the way it came out.


Thanks so much for stopping by my blog today

Mandi xox

Friday, July 10, 2015

Craft Stamper July Challenge Reminder


Hello Friends

Welcome back I am here to remind you about the Craft Stamper Challenge for the month of July. Come and join in the fun and be in with a chance of winning some goodies.  The challenge this month is take a stamp so you can pretty much make anything you want as long as there is stamping involved.

There is a pretty great prize up for grabs it is four stamping plates from Art Journey. Hop on back over to the Craft Stamper Blog for all of the details.

I got out my Paddington Bear Stamp for this card.  How cute is he? I used to watch the cartoon and the animation when I was wee. I also recently saw the Paddington film it was really good. There is something just too cute about a bear in a duffle coat he is hard to resist don't you think?

  This is my first time using this stamp. I bought it in Glasgow when I was home a few month's ago. I got mine from Craft World but I am sure you can find them other places. I tried to look them up online but all I could find was a place that sold them here.

I used my water colour paints  to colour him. Then I made some paint splashes to create the rain in the background. I painted wee puddle at his feet to make him look like he is standing in one. 

So now it is your turn go and create something and join us in this month's challenge.

Thanks so much for stopping by my blog today.

Mandi xox


Wednesday, July 8, 2015

Beautiful In Every Way


Hello Friends

I spent last night in my craft room and made five cards I was on a roll It is so unusual for me as I never seem to make a few cards in a row. I was testing out my new Metallic Gelatos. Oh how I love them. They are so creamy and lush to work with. This is one of the cards I made. I created my background with this lovely stamped flower from Unity it is called Much Of A Good Thing.  The Sentiment is from another stamp set called Every Way Beautiful.


I stamped the image with distress inks Bundled Sage & Worn Lipstick. I then coloured them with two of the gelatos that were closet in colour  they are Iced Pear & Melon.  I used them pretty much like water colour paints. I rubbed some of each colour on to my craft sheet and added some water and used a paint brush to colour with. I wanted a messy look to it so I added some gelato splatters to the background. Next I stamped my sentiment with Memento Tuxedo Black Ink.  I then distressed the edges of the paper and added it to a black card base.

I really love the way it looks  the photos do not do it any justice. The sheen from the gelatos is really pretty but it does not show very well in the picture.

Thanks so much for stopping by my blog today.

Mandi xox

I would like to enter my card in to the following
 Virgina's View Challenge 16


Tuesday, July 7, 2015

Chalk Painting Thrift Store Furniture


Hello Friends

I picked up this chair at Goodwill at the weekend. It cost me  $2!!!  Yes $2 I cannot believe it. This has got to be the bargain of the century. It is solid wood and very heavy. It is old and worn and I LOVE that, but what I don't love is the colour. I am not a fan of dark wood.  I am a fan of paint though! I have always wanted a distressed turquoise chair. This was perfect to make in to one. I love the look of distressed furniture but it can be pretty expensive to buy.

 I don't know if you have been hearing all the craze about chalk paint lately.  I keep hearing how great Annie Sloan chalk paint is and how you do not need to prep with it. Now I LOVE the idea of NO prepping but the price tag on AS paint is a little too steep for me. I refuse to pay almost $40 for paint of any kind.  So while I was at Walmart I saw this Waverly chalk paint. I bought this purely for the colour and the price tag $5.97. You all know how much I love turquoise right??


This is my first time using chalk paint. I have nothing to compare this paint to since I have never used it before.  However I have used latex millions of times and oil based paint that I hate due to the smell. I wiped down my chair and got rid of the dust. Then I used a foam paintbrush it was all I had.

 
I gave the chair a coat of paint.  I was really shocked that is adhered so well. This chair has a lot of shiny finish still on it. I was skeptical that it would stick but it did!  I let it dry and hour or so. It says to wait 2 hours in between each coat but I sped things up a little with my hair dryer. I had nothing to lose right this was a $2 chair. I gave it another coat of paint and love love loved the result.


I took a sanding block and went around the edges and everywhere that was naturally worn before it was painted. Then I went over it with a damp cloth and rubbed those areas again lightly to make the dark brown show through the paint.  I absolutely love the end result.  I am a complete fan of chalk paint now. I will use it on everything and anything ha!! It says you can use it on glass and metal too.  I have even found some recipe's for making your own but really for the price of this you can't go wrong. You are meant to finish this paint with a wax or sealer of some sort but I have left mine be.  I love the natural chalky look of it and I want to see how the paint holds up without adding anything else to it.


I hope you like my new upcycled project.  I had half a jar left after I finished my chair so I ended up painting my husband's bedside table another thrift store find this was only $3.50.  I must add that he told me not to paint it. He must love the all natural look! I went ahead anyway and he came home from work today and LOVED it ha! Just as well eh :) I gave the top of the table 3 coats of paint for full coverage and did not do any distressing on it. I must add the that top of this table is laminate and really slippery and the paint stuck really well to it. I think that is maybe why it needed 3 coats though.


So after two projects I still have about 1/4 of the pot left. So this little pot goes a really long way. I hope you enjoy my projects. If you want to change up your furniture or upcycle some thrift store finds give chalk paint a try. You might love it as much as I do :)

 Thanks so much for stopping by my blog today.

Mandi xox

Here is another upcycle project I did using the same paint.

Craft Stamper May Challenge

Hello Friends! I hope everyone is doing ok during this crazy time.  I just wanted to remind you that we are still running the Craft...